Required Assembly: Beginners Walkthrough
People can get nervous at the aspect of building their own PC's. But let me assure you that it is all in their head. The components that make up a PC are designed to be placed in exclusive slots specifically made for such component. You cant accidentally put a CPU inside a GPU's slot. So as long as you place such components properly into their respective slots, there should not be any problems. Here is a piece by piece walk-through to follow when putting your PC together.
>Required Tools:
-Philips head screw driver
-Twist ties for hanging wires {optional}
-Cardboard or any other non-conducting surface.
>Assembly:
-a. Touch metal surface to ground static electricity in body.
-b. Place motherboard and CPU onto non-conducting surface {cardboard}.
_________________________________________________________________
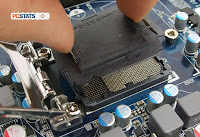
-c. Remove the protective cover from the CPU socket on the motherboard.

_________________________________________________________________
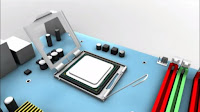
-d. Place the CPU into the socket. Watch for the gold triangle marks on the corner of the CPU. Align the notches on the CPU and socket until the CPU sits flat inside the socket.

_________________________________________________________________
-e. Close the protective plate over the CPU, but do not apply pressure. Then push cam lever into retention tab.
_________________________________________________________________
-f. Get your CPU cooler and check it for thermal compound, located on the bottom of the heatsink. Then mount it onto the top of the socket, into the holes on the motherboard. Connect the fans 4- pin connector into the motherboard.
_________________________________________________________________
-g. Place RAM {Memory} sticks into their respective slots on the motherboard. Watch the location of their notches. Then click them into place until the brackets on both sides snap onto the memory stick.
_________________________________________________________________
-h. Remove the side panels from the case, then install the motherboard back plate into the rear of the case. Click it into place from the inside of the case, and make sure that it lines up properly with the mainboard.
_________________________________________________________________
-i. The motherboard is now ready to be placed into the main case. Watch for the mounting holes on the motherboard, and locate the corresponding positions inside the case.
Place motherboard standoffs {stilts} Into the holes inside the case, then place motherboard on the standoffs {stilts}, then tightens screws. Make sure that the motherboard is aligned properly with the back plate.
_________________________________________________________________
-j. Mount the power supply and make sure that the exhaust fan is positioned correctly. Screw in the power supply to the case.
_________________________________________________________________
k. Locate the mainboard 24-pin power cables and attach them into their proper mainboard connector. Do the same with the 4-pin CPU power connector.
_________________________________________________________________
-l. Mount the Hardrive into the HDD bay and screw it properly into place. Connect the power and SATA cables to the back of the Hardrive. Then connect the SATA cable to the motherboard.
_
_________________________________________________________________
-m. Remove drive cover and mount the DVD drive using the screws that were included. Connect the power and SATA cable to the back of the DVD drive then connect the SATA cable to the motherboard.
_________________________________________________________________
-n. Locate the cables for the front LED's and buttons and connect them to the motherboard. Then connect the USB and audio connectors from the case to the mainboard. Consult your motherboards user manual for further cable connection help. Connect 3-pin connectors from the case fans to the motherboard.
_________________________________________________________________
-o. Remove the needed back plate covers from the back the case. Mount the GPU {video card} into the PCI-Express slot, and screw it properly into place. Connect the 2 Six-pin power connectors to the back of the GPU.
_________________________________________________________________
-p. Attach side panel to case and attach power cord, ethernet cable, monitor, keyboard and mouse. Power on the computer and insert the Windows 8.1 DVD into the DVD drive. That's it, all done. You should have a fully functional gaming PC, well, almost. Don't forget to get the needed drivers for your GPU, network, and audio, though Windows 8.1 should do this automatically.


